Like this post? I am no longer actively blogging through Work In Progress (I am no longer a teenager, but still a weirdo) so feel free to follow me on Instagram, YouTube, and my other blog, Frugal Girl Glamour, to see what I’m up to!
NOTE: Bleaching your hair in any and all forms is bad for it. You should always do a strand test when dying your hair. This method is hardly any different than getting a box of color (Last time I used a box mix, my hair turned out very orange; this method leaves it a much more natural shade for whatever reason.) If you are wanting to dye the whole of your hair significantly lighter than it’s current shade, please go to a stylist. But if you’re doing streaks, or trying to lighten up a too-dark dye job, then this should do no harm.
Second NOTE: I cannot say whether or not this method will work on your hair. It works very well on my hair and my step mom’s hair, since we both have very porous strands. Whereas my friend had no luck getting this to work in her hair—it’s simply resistant to the mixture (and almost anything aside from salon grade bleaching/dying formulas) because her hair has low porosity. If your hair tends to damage or get frizzy easily, this will probably work for you better than someone who sees very little damage from styling and all that, but I cannot make any guarantees. 🙂
That’s aaaaaall…
I’m heading out to my aunt and uncle’s house this weekend with my boyfriend. My aunt and I decided that we’re going dye our hair, which I’m pretty pumped about. In preparation for dying streaks of “atomic turquoise” into my locks, I decided to lighten a few sections of my hair (since I have dark, nearly black, brown hair). I had tested a baking soda and hydrogen peroxide mixture on a small chunk of hair a few months ago, and decided to use that method instead of spending $10 on a bottle of hair bleach and only using 1/8 of it.
Supplies needed:
- Hydrogen Peroxide
- Baking Soda
- Bowl
- A brush to put the mixture onto your hair—I used a spongey craft brush.
- Aluminum foil if you’re doing sections.
- A plastic bag if you’re doing all of your hair.
- An old t-shirt to wear.

I started with clean hair, and a general idea of which pieces of hair I wanted to bleach.
I sectioned off the parts of my hair I wanted colored, and tied the rest of my hair out of the way.

Here is the section underneath my bangs before lightening.
I then mixed up H2O2 with baking soda until it became a paste. This paste should be fluid enough to easily spread into your hair, but it shouldn’t be so thin that it drips all over the place.
(Update 6/12/2012: I provided the recipe in my “Lightening Blonde Hair” post.)
(Update 8/9/2012: In case you don’t make it down to the comments in my other H2O2 & Baking Soda Lightening post, Lisa shared a mishap she had while attempting this herself. “I’d like to warn anyone and everyone. Do not mix this in an enclosed container. I mixed it in a fruit smoothie blender. When I tried to take off the lid, it literally blew up. It made a huge POP and that stuff went everywhere. It was also very hot!!! Scared me so bad.” Whenever there’s a chemical reaction going on—in this case, what’s changing your hair color—there will often be a gas that leaves the mixture and can create pressure in a closed container. Be careful!)
I used tin foil to keep my streaks nice and tidy. I learned, somewhere on the internet, how to fold back the aluminum foil at the end so that you have something to hold onto while applying color/bleach to your hair.
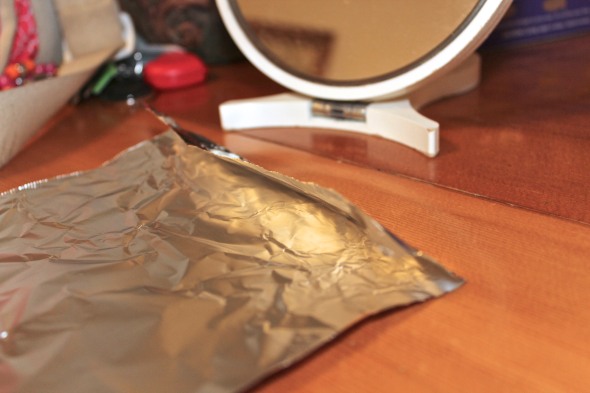
Fold the foil like so.
The folded end goes on the underside.
When you color/lighten pieces of hair that frame your face, you want to place the foil to the side of your sectioned hair that is toward the back of your head. (So that you can see where you’re applying the mixture—clever, right?)

Like this.
Be careful to cover all of the sections evenly, and pay close attention to the ends. I find it easiest to take rows of hair to apply the mixture to, so every strand is covered without having to work too hard at it.
When all of your desired sections of hair are covered in goop and tinfoil (or a plastic bag, if you’re lightening all of your hair), then apply heat, using a hair dryer. I did for about five minutes (everyone in my house was trying to sleep… oops) but I’m pretty sure that if you have the patience—and it’s not one in the morning—spending ten to fifteen minutes heating the sections would be just about perfect.
This next part is pretty easy: Sit pretty and wait for blonde hair to appear!
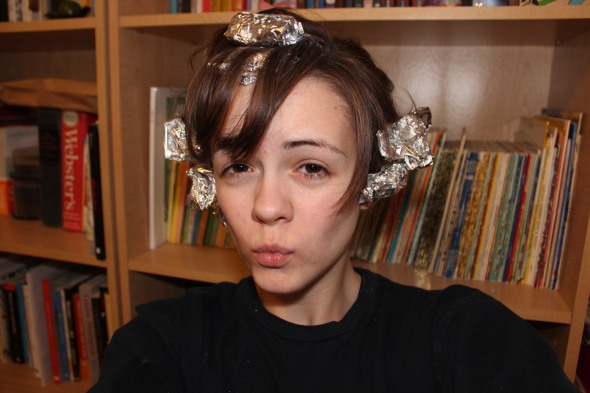
Here I am. Sitting pretty.
I let my hair sit for about an hour and got significant results; certainly not platinum blonde, but blonde.

My blonde bangs!
I’m super happy with the final product! I was very tempted to lighten all of my hair to this shade—especially with how cheap and simple this method is. I’ll probably do another round of lightening on these sections, though, to ensure that the turquoise dye shows up without being dingy. 🙂
My hair doesn’t seem particularly damaged after this process, either. That might just be from going “no ‘poo,” though. Either way, I like it!
Things to Keep in Mind:
- I have very dark brown hair. If your hair is lighter, you don’t need to leave the color in for as long as I did.
- Heat is not necessary, but it speeds up the process.
- Try not to get too much of the mixture on your scalp; it doesn’t feel very nice.
- You can always repeat the process to get a lighter shade; keep an eye on the color of your hair every ten to fifteen minutes and rinse it out sooner rather than later so that you don’t risk going too blonde for your taste.
Please share your experiences with peroxide & baking soda lightening! I can only speak for women with dark, coarse, wavy hair. If you’re a redhead, blondie going blonder, or if you have very curly or very fine hair, I’d love to hear how this method worked for you!
Thanks for reading,
-Dizzle ❤
Disclaimer: I am by no means a hair stylist or anything of the sort. I simply love doing hair and makeup, and I like finding cheap ways to look good! Please use common sense if you attempt to lighten your hair this way, and please do not hold me accountable for potential mishaps.

